Create a Module (Product Import) to transfer product and options data in SBX to OTS.
Only enable products (status = 1) are transferred, and disabled product data is not inserted into all related data tables.
Color option is excluded from option-related data during import.
In OTS: color option in product_option, product_option_value, product_extra_option, product_extra_option_value are replaced with color_option/color_extra_option (only one) and color_option_value/extra_color_option_value (only one) created in OTS.
In the data tables of some language packages, use English as Chinese to insert into the data table.
This time we jointly synchronize SBX 23 data tables:
ots_option
ots_option_description
ots_option_value
ots_option_value_description
ots_branding_group
ots_branding_group_description
ots_product_group
ots_product_group_description
ots_product
ots_product_description
ots_product_option
ots_product_option_description
ots_product_option_value
ots_product_option_value_description
ots_product_discount
ots_product_option_value_discount
ots_product_extra_option
ots_product_extra_option_value
ots_product_image
ots_product_image_description
ots_product_option_value_hover_description
ots_product_option_value_layer_image
ots_product_square_meter_discount
After synchronization to OTS, 25 tables are actually affected, adding 2 tables to No.6
ots_product_to_manufacturer
ots_product_to_manufacturer_description
After the import is completed, the product data added by OTS itself will not be affected.
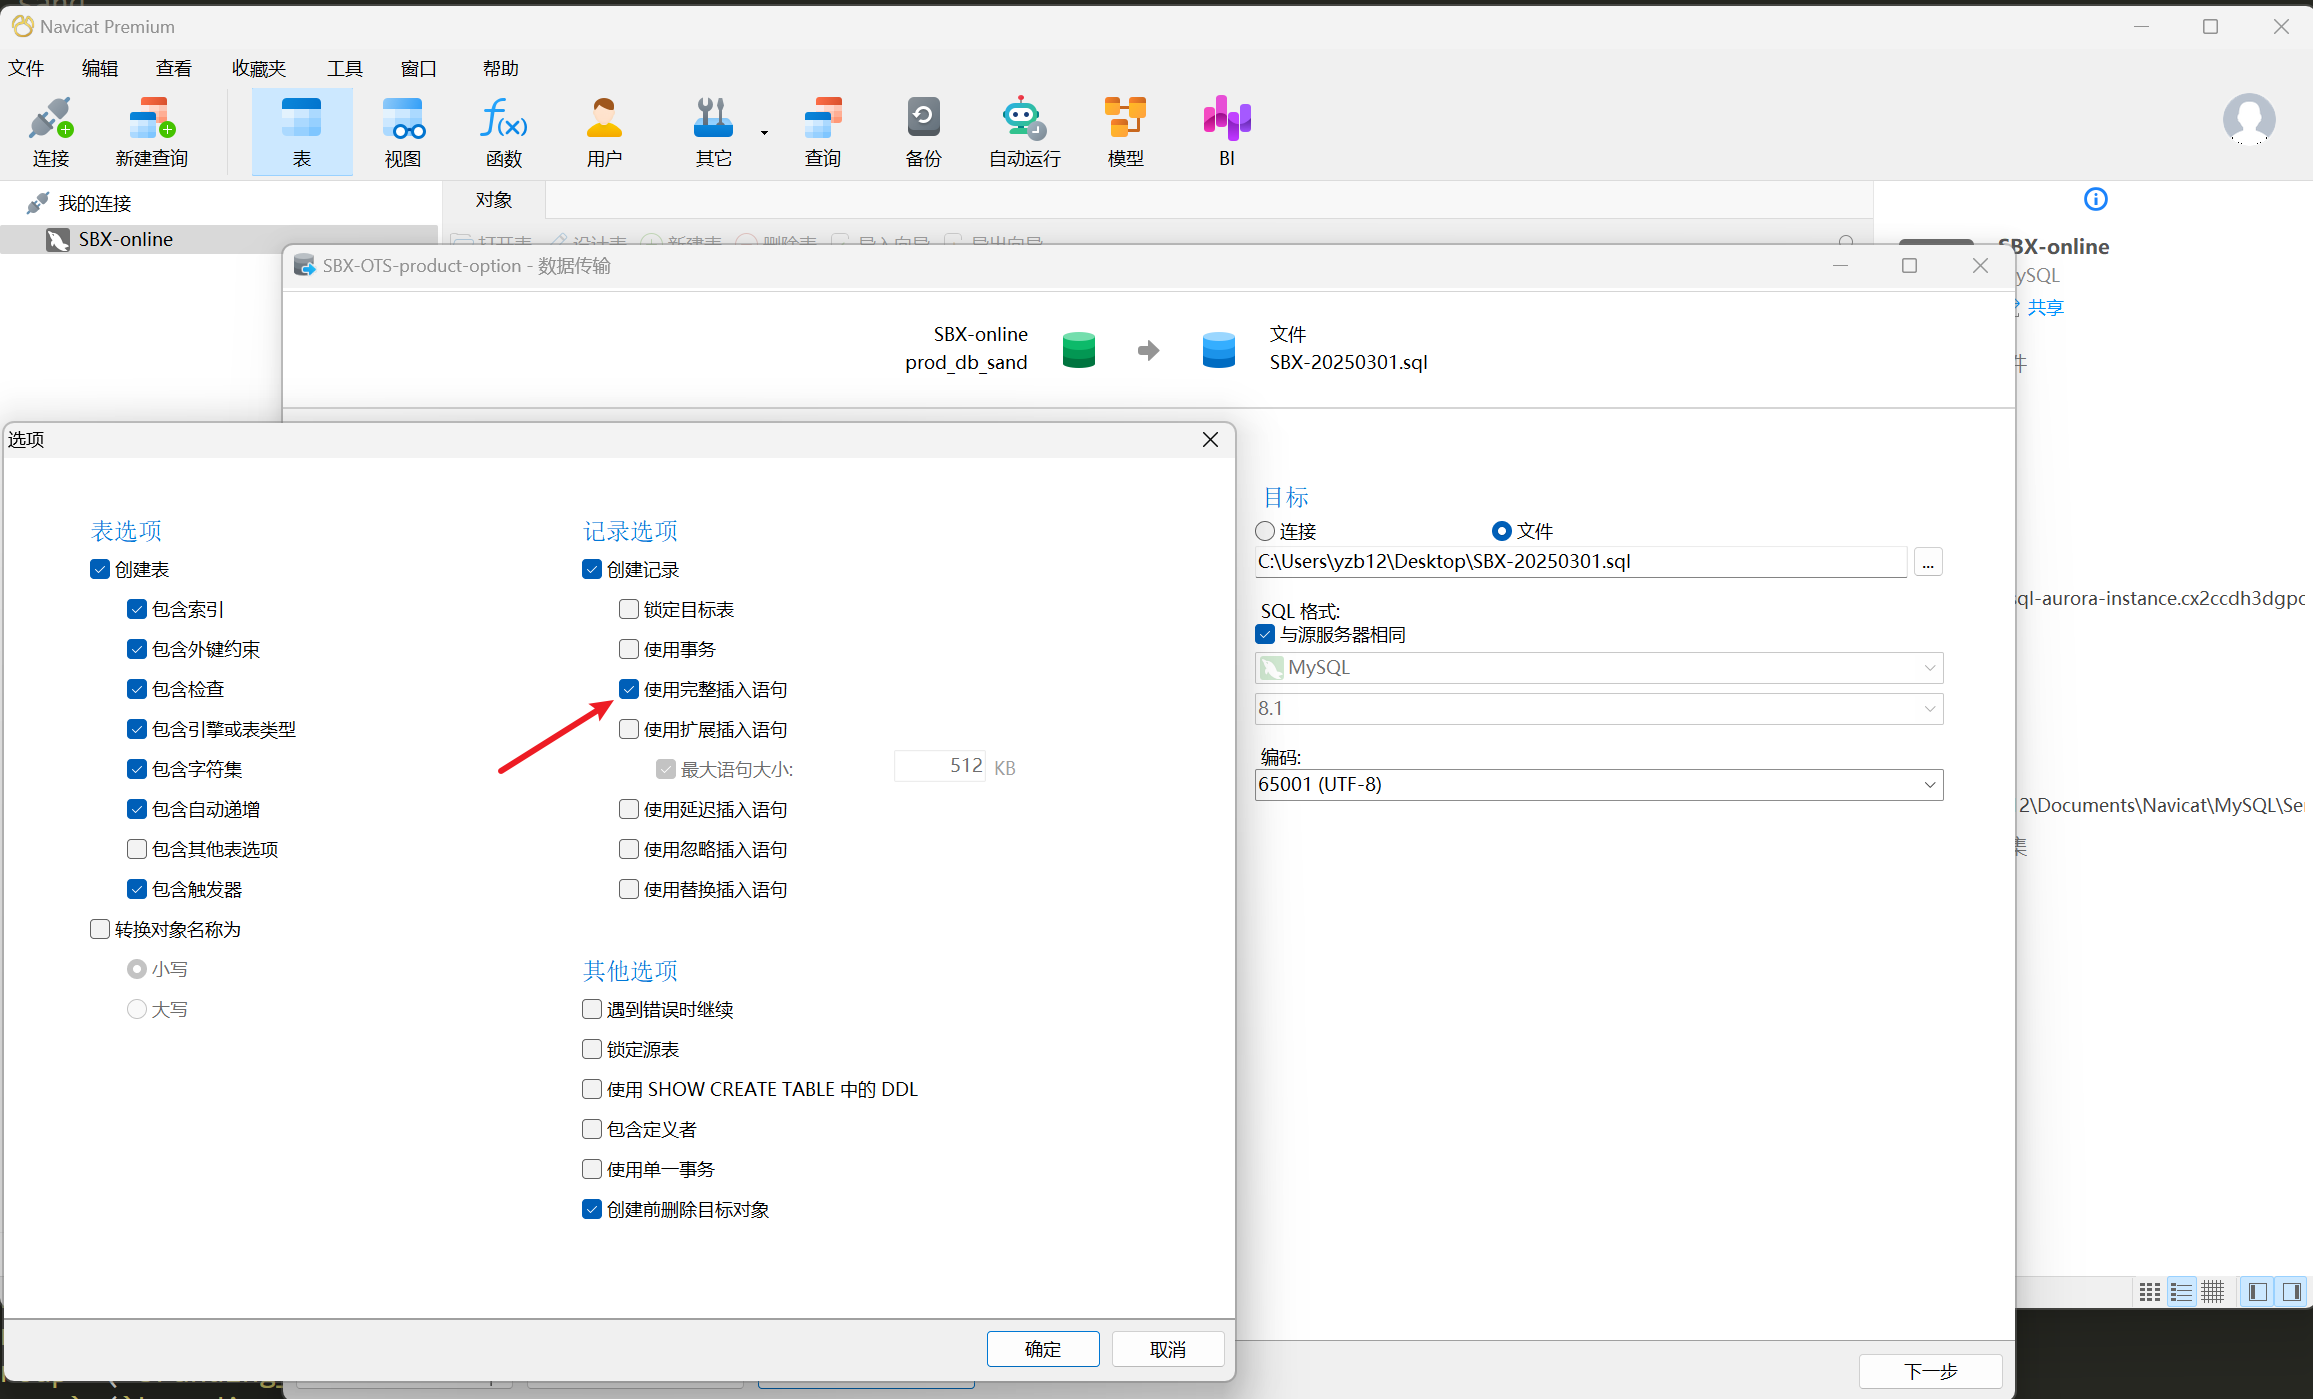
There is a necessary condition that the exported SQL must be insert statements line by line, otherwise the program will not be able to parse it. Reference Export Configuration: https://redmine.easydingzhi.com/attachments/229
The general workflow is as follows:
Read a line of string
Obtain the table name + fields name + field values through regular matching.
Note: In some scenarios, you must assemble an array of the same structure. For example, when synchronizing the English language package, generate a Chinese language package.
Arrange the data of No.3 into an insert statement and insert it directly into the data table.
Note: Delete the data in the associated table based on the primary key id before inserting.